How to Prepare a Logo for Embroidery: The Expert Guide to Perfect Stitches (2026)
A digital logo is a flat arrangement of pixels, but a beautiful piece of embroidery is a three dimensional sculpture made of thread. If you’ve ever felt the sting of a digitizing fee you didn’t understand or received a custom hat where the fine text was a blurry mess, you know that a great screen design doesn’t always translate to fabric. Learning how to prepare a logo for embroidery is about more than just changing a file extension. It’s about understanding how light, texture, and tension work together to transform a digital vision into a tactile reality that lasts for years.
We understand the frustration of feeling lost between printing requirements and the technical world of stitches. You want your brand to look as professional on a custom polo as it does on your website, and you shouldn’t have to be a textile expert to get there. This guide provides a clear, actionable checklist to ensure your artwork is ready for the machine. We’ll explore the essential steps of professional digitizing, the impact of 2026 sustainability standards on thread choice, and how to simplify your design for maximum impact. By the end, you’ll have the confidence to start your next custom project with the precision of a true artisan.
Key Takeaways
- Understand the fundamental shift from digital pixels to physical thread to avoid common design pitfalls and poor results.
- Learn exactly how to prepare a logo for embroidery by identifying which fine details need simplifying for the best visual clarity.
- Master the technical constraints of sizing to ensure your brand remains legible on everything from structured hats to soft baby blankets.
- Discover how to pair your logo with the right fabric and thread, ensuring your custom pieces are both beautiful and durable.
- Gain confidence in the digitizing process as a professional one-time investment that transforms your vision into a scalable masterpiece.
Why Pixels Aren’t Stitches: Understanding the Embroidery Process
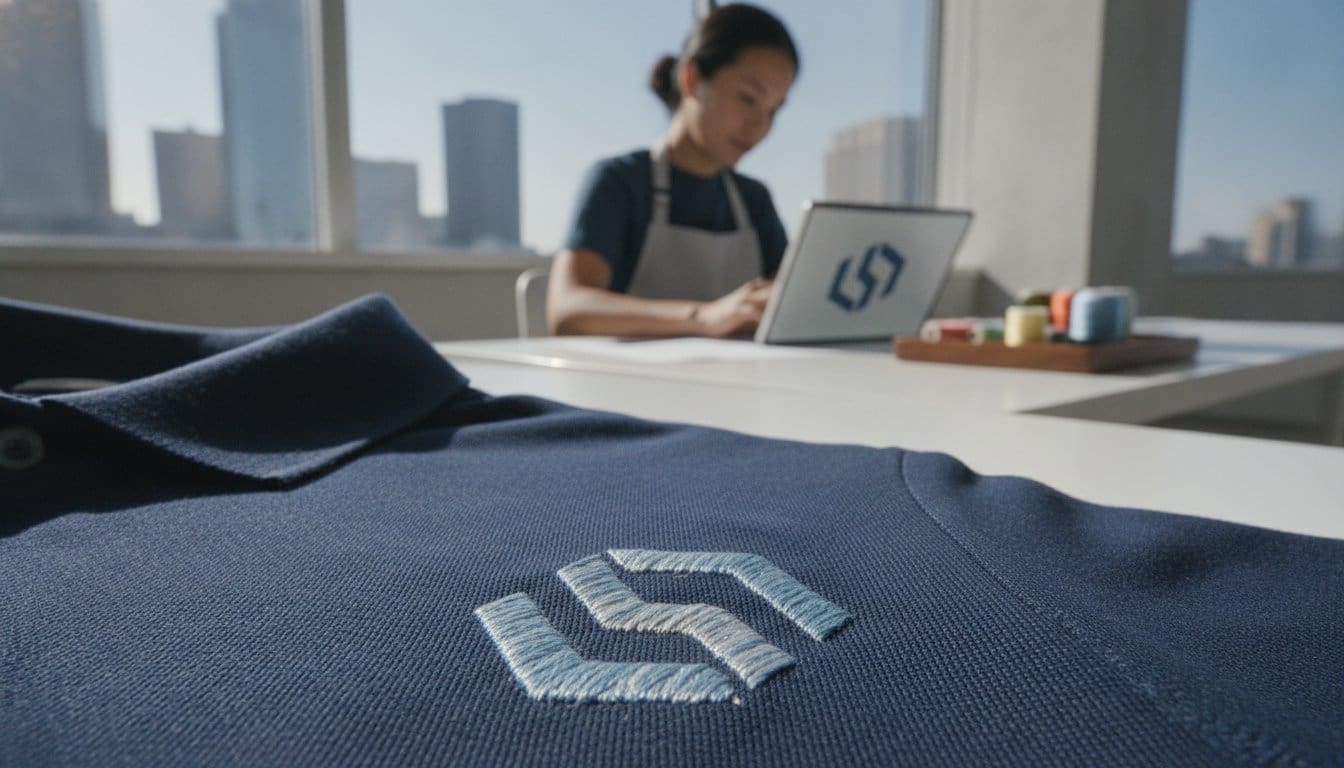
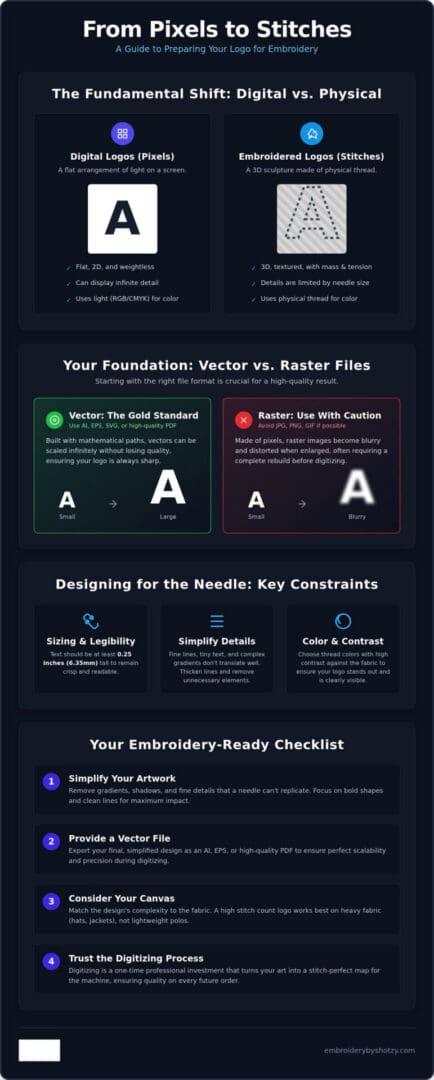
Pixels are weightless, but thread has mass. When you look at your brand’s logo on a laptop, you’re seeing a flat arrangement of light. When that same design moves to one of our custom hats or embroidered bags, it becomes a physical structure with depth and tension. Screen printing is like painting a wall; the ink sits on the surface. Embroidery is more like building a house; the thread must be anchored into the foundation of the fabric. This fundamental difference is why a high-resolution image is only the first step in learning how to prepare a logo for embroidery.
A beautiful 300 DPI image looks crisp on paper, but a needle doesn’t care about resolution. It cares about paths, density, and stitch count. Stitch count refers to the total number of individual thread loops required to recreate your design. A high stitch count creates a dense, premium feel, but if it’s too high for a lightweight fabric like a performance polo, the logo will pull and pucker. Finding that balance is the mark of true craftsmanship. Every stitch adds weight, and every needle penetration affects the integrity of the garment.
What is Logo Digitizing?
Digitizing is the essential bridge between your graphic design and the physical machine. It’s the process of translating a visual file into a set of instructions that tell the needle where to go, when to stop, and which color to use. While many shops use auto-digitizing software that guesses the best path, we take an artisan approach. We map out every needle drop by hand to ensure the thread flows naturally with the grain of the fabric. This meticulous computerized embroidery process ensures your logo doesn’t just look good; it stays durable through hundreds of washes. Because this is a complex technical task, your digitizing file is a one-time investment. Once we’ve perfected the map for your logo, it’s ready for every future order.
Raster vs. Vector: Why Your File Format Matters
To get the best results, start with a vector file. Formats like AI, EPS, or high-quality PDFs are the gold standard for preparation because they’re based on mathematical lines rather than pixels. This allows us to scale your logo from a tiny sleeve hit to a large jacket back without losing any detail. Raster files, such as JPEGs or PNGs, often become blurry when enlarged. If your only copy of a logo is a low-resolution raster, it may require a total rebuild before we can begin. Starting with clean, vector lines saves you time and ensures your setup fees go toward quality, not just fixing basic artwork errors.
Designing for the Needle: Key Technical Constraints
Designing for the needle is an exercise in restraint. While a digital canvas offers infinite space, a needle has physical boundaries that cannot be ignored. The embroidery production process relies on a careful balance between thread weight and fabric tension. If a design is too dense, the thread will overwhelm the garment, causing it to pull or pucker. This is especially true when working with delicate items like silk versus rugged materials like heavy canvas. Understanding how to prepare a logo for embroidery requires shifting your focus from what looks good on a screen to what works in a three dimensional space.
Sizing is perhaps the most critical constraint. A logo that looks majestic on a billboard or a large monitor might lose its soul when shrunk down to fit on the front of a hat. Details that are only a few pixels wide simply cannot be rendered with a physical needle. When thinking about how to prepare a logo for embroidery, consider the smallest version of your logo. If the details are already hard to see on your phone screen, they will likely be impossible to stitch clearly. If you’re ready to see your vision take shape on custom polos, we can help you navigate these technical choices to ensure a perfect finish.
Color management also shifts when you move from pixels to physical spools. In the digital world, you have access to millions of hex codes. In our Houston studio, we translate those digital RGB or CMYK values into physical spools of high-quality thread. Because thread reflects light differently than a screen, colors can appear slightly different once stitched. We often guide our clients toward choosing thread shades that provide enough contrast against their chosen fabric to ensure the logo truly pops.
Minimum Sizing and Line Thickness
To keep your branding crisp, follow the ‘Quarter-Inch Rule.’ Most standard embroidery needles require text to be at least 0.25 inches tall to remain legible. When lines are too thin, they disappear into the fabric or create ‘thread soup,’ a messy buildup where the needle strikes the same spot too frequently. Adjusting the negative space between elements is vital. If your logo elements are too close together, the thread from one section can ‘bleed’ into the next, softening the sharp edges of your brand.
The Font Factor: Choosing Stitch-Friendly Typography
Typography plays a massive role in your final result. Simple block fonts almost always outperform delicate, wispy scripts at smaller scales. If your brand uses serifs, those tiny decorative ‘feet’ on letters, we may need to thicken them slightly to ensure they don’t vanish. For larger text, we use ‘fill stitches’ to create a woven texture, while ‘satin stitches’ are reserved for borders and smaller lettering to provide a smooth, premium sheen.
Simplifying Your Logo: A Step-by-Step Preparation Guide
Simplifying your design is often the most challenging part for brand owners, yet it’s the most rewarding step in the how to prepare a logo for embroidery process. Many iconic brands use a ‘stitch-lite’ variant specifically designed for physical applications. This isn’t about diluting your brand; it’s about translating it into a medium that values clarity over complexity. A great way to start is with the ‘Squint Test.’ Look at your logo on a screen and squint until the image becomes blurry. Whatever details disappear first are the ones that will likely fail when rendered in thread. By pruning these elements early, you create a more premium, high-end feel that highlights the quality of the craftsmanship rather than the clutter of the design.
Collaborating with a professional artisan allows you to keep the soul of your brand while making these necessary technical adjustments. We often work with our Houston clients to identify which parts of their story are essential and which can be simplified for better results on custom patches or embroidered scrubs. This technical guide to preparing logos shows that successful embroidery relies on clean, intentional paths. When we remove unnecessary visual noise, the final product looks intentional, sharp, and professional.
Eliminating Gradients and Complex Shading
Thread is a solid, tactile medium. It doesn’t naturally fade or blend like digital ink. While we can use specialized techniques to layer colors and create a faux-gradient, it’s usually more effective to use solid color blocks. This approach creates bold, distinct dimensions that stand out against the fabric. If your digital logo has a subtle glow or a soft drop shadow, consider removing those elements. This prevents the embroidery from looking muddy or unfocused.
Removing Outlines and Tiny Details
Every line in an embroidery design adds physical weight and bulk. Double-outlining a logo might look great on a sticker, but on a garment, it can cause the fabric to pucker and pull. We recommend omitting tiny details like ‘established’ dates or long taglines if they’re going on a small area like a sleeve. If you have a complex mascot, try simplifying it into an iconic silhouette. This ensures the how to prepare a logo for embroidery workflow results in a clean, recognizable image that people can identify from across the room.
Beyond the File: Choosing Your Canvas and Thread
Preparing your digital file is only half of the journey. To achieve a truly professional finish, you must consider the physical canvas where those stitches will live. A logo designed for a rugged canvas apron requires a different approach than one destined for a delicate baby blanket. When you’re learning how to prepare a logo for embroidery, you have to think about how the fabric’s weight and weave will interact with the thread. In our Houston studio, we often discuss the climate factor with our clients. We recommend breathable, moisture-wicking fabrics that can withstand the local humidity while providing a stable foundation for high density designs.
Texture also plays a vital role in the final look of your brand. A pique polo has a bumpy, mesh-like surface that can swallow small stitches, whereas a jersey knit is smooth but prone to stretching. If your logo has fine details, we might suggest a specialty thread with a higher sheen or even a metallic finish to help it stand out against a textured background. Understanding these material relationships is a key part of how to prepare a logo for embroidery effectively. If you’re ready to see how your design looks on premium materials, you can explore our options for custom patches and apparel to find the perfect match for your vision.
Embroidered Hats and Custom Patches
Hats present a unique challenge because of their curved surface. We use a ‘Center-Out’ rule for digitizing these logos; the machine starts in the middle and works toward the edges to prevent the fabric from shifting or bunching. If your logo is exceptionally detailed or contains very small text, custom patches are often the superior choice. Patches allow us to stitch onto a stable backing before applying the finished piece to the hat. This is also the perfect time to consider 3D ‘Puff’ embroidery. This technique uses a foam insert to lift the thread, creating a bold, athletic look that adds immediate perceived value to your brand.
Polos, Scrubs, and Delicate Gifts
For lightweight items like custom polos and medical scrubs, stabilization is everything. We use specific backings to ensure the logo doesn’t sag or pucker after the first wash. When we create personalized baby blankets or monogrammed towels, we pay close attention to the ‘loft’ of the fabric. Long-fiber towels can hide stitches, so we use a water-soluble topping to keep the thread sitting proudly on top. We also take pride in ensuring the back of the embroidery is as clean as the front. This is especially important for items worn against the skin, where messy knots or stray threads could cause irritation.
The Shotzy Difference: Why Expert Partnership Beats Automation
In an era of instant clicks and automated algorithms, the human touch remains the most vital tool in our Houston workshop. Many large scale platforms rely on automated scripts to convert files, but these tools lack the intuition of a master artisan. They can’t feel the tension of the thread or understand how a complex design will settle into a specific weave. When you are learning how to prepare a logo for embroidery, the most important step is choosing a partner who looks at your brand with an artist’s eye. We don’t just run a machine; we craft a narrative in thread.
We treat every project as a piece of legacy. Whether you’re ordering a single personalized baby blanket for a gift or five hundred embroidered hats for a corporate event, we apply the same meticulous standard. Automation lacks intuition. While a computer can calculate a path, it cannot account for the way a needle interacts with the unique grain of a high quality polo or a heavy duty apron. Since 2014, we’ve helped Houston businesses scale their branding by providing this level of personal investment. We ensure that your very first prototype is as perfect as the last item in a bulk order.
This collaborative approach also provides long term value. Our one-time logo digitizing fee is more than just a setup cost; it’s an investment in a permanent asset for your brand. Once we’ve perfected your stitch map by hand, it’s archived and ready for any future application. This means your branding remains consistent across every garment you choose, from custom patches to embroidered scrubs. Understanding how to prepare a logo for embroidery is much simpler when you have a creative partner to guide you through the technical nuances.
Our Collaborative Process in Houston
Our process is designed to be methodical and purposeful. It begins with an initial consultation and artwork audit, where we review your files for the technical constraints discussed earlier in this guide. Next, we move into professional hand-digitizing. We map every needle drop to ensure the thread flows naturally with the fabric. Finally, we move to precision application and quality control. Every piece is inspected to ensure the tension is perfect and the finish is clean, both on the front and the back.
Ready to Start Your Project?
Sending your files to us is the first step toward a flawless finished product. We recommend organizing your artwork in a vector format, but we are happy to review whatever you have to provide a professional assessment. If you’re planning a bulk order for uniforms or a special event, we can help you coordinate styles and colors that make your logo truly stand out. We take pride in being a helpful guide for our clients, ensuring the transition from a digital idea to a physical masterpiece is seamless and rewarding.
Let’s bring your logo to life—Contact Shotzy today
Bring Your Vision to Life with Expert Precision
Your brand is more than just a file on a screen. It’s a promise of quality and a reflection of your unique story. By understanding the technical constraints of the needle and the importance of simplifying your design, you’ve already overcome the biggest hurdles in the creative process. Mastering how to prepare a logo for embroidery is the essential first step toward creating a physical item that carries your brand with pride for years to come.
Since 2014, we’ve provided expert Houston craftsmanship to help businesses and individuals transform their digital ideas into tangible masterpieces. Whether you’re ordering personalized baby blankets or a fresh set of corporate polos, our boutique approach ensures every stitch is placed with care. Our one-time digitizing fee is a long term investment; once your logo is perfected, the file is yours forever. We’re ready to partner with you to ensure your project is a flawless success from the very first stitch. We can’t wait to see what you’ll create next.
Start your custom Houston embroidery project with Shotzy
Frequently Asked Questions
Can I use a regular JPEG or PNG file for embroidery?
You can certainly send a JPEG or PNG, but these files cannot be used directly by our machines. Since these are raster formats made of pixels, we must first translate them into a series of paths and stitches through digitizing. This is a critical part of how to prepare a logo for embroidery, as it ensures the final result has the depth and texture your brand deserves.
How small can the text be in my embroidered logo?
Text should be at least 0.25 inches tall to remain crisp and legible. When letters are smaller than this, the needle must strike too close together, which causes the thread to bunch and lose its shape. If your logo has very fine taglines, we often recommend simplifying the design or enlarging the text to maintain a premium look on your chosen garment.
What exactly is a digitizing fee and why do I have to pay it?
A digitizing fee covers the skilled labor required to map out every single needle drop in your design. It’s not a simple file conversion; it’s a technical blueprint for our machines. At Shotzy, this is a one-time investment for your brand. Once we’ve created this specialized file, it’s yours forever and can be used for all future orders of that same design.
Why does my logo look different on a hat than it does on a shirt?
Different fabrics and shapes interact with thread in unique ways. A structured hat has a curved surface that requires a specific center-out stitch pattern, while a flat polo shirt allows for more traditional paths. The texture of the fabric, such as a bumpy pique knit versus a smooth jersey, also changes how the stitches settle and reflect light once the project is finished.
How many colors can I have in my embroidered design?
Most professional embroidery machines can handle up to 15 different thread colors in a single design. However, many of the most iconic and high-end logos use between one and six colors for maximum visual impact. Using fewer colors often results in a cleaner, more sophisticated finish that stands out clearly against the background of your custom apparel or patches.
Do I need a different file for custom patches vs. direct embroidery?
Yes, the technical instructions often differ between these two applications. Custom patches require a finished border, such as a merrowed or satin edge, to keep the fabric from fraying. Direct embroidery is digitized specifically for the weight and stretch of the garment it sits on. We handle these technical adjustments to ensure your logo looks consistent across every item in your collection.
Can you embroider gradients or shadows?
Embroidery works best with solid blocks of color rather than smooth digital gradients. While we can use a step-stitch technique to blend two thread colors together, it won’t look identical to a printed fade. For the best results when learning how to prepare a logo for embroidery, we suggest replacing soft shadows and glows with clean, solid shapes that provide better definition.
What is the best file format to send to an embroidery shop?
Vector files like AI, EPS, or high-quality PDFs are the gold standard for embroidery preparation. These formats use mathematical lines instead of pixels, which allows us to scale your logo to any size without losing clarity. Starting with a clean vector file ensures that the digitizing process is accurate and reflects the true precision of your original brand artwork.